Monday, October 31, 2011

A Pumpkin Bowl of Recipes

  After the colonists came over to America, they used pumpkin in side dishes, desserts, stews, soups, and even beer. Although the colonists had a good idea when it came to baking with pumpkin, I have to admit, when it comes to choice of drinks, I’ll choose a pumpkin spice latte over pumpkin ale and save the ale for the stew.

  If you are addicted to pumpkin spice lattes and can’t afford to buy one every day, you might want to try the Pumpkin Spice Latte recipe below. Depending on how good of coffee you have and whether or not you grind your coffee fresh, the pumpkin spice latte made from the recipe below tastes pretty darn close to one from Starbucks.
When it comes to baking with pumpkin, sugar pumpkins, also known as pie pumpkins, have the best flavor. While Jack-o-lantern pumpkins are grown for their large shell, sugar pumpkins are grown for their flavorful insides. With a thicker shell, these types of pumpkins are delicious when baked and have the tasty flavor of their squash relatives.
For an alternative to the bread bowl, take advantage of the plentiful supply of sugar pumpkins available at grocery stores and farmers’ markets. When it comes to homemade soups and stews, sugar pumpkins make delicious and edible bowls without all the extra carbohydrates. Whether you are looking to add extra vegetables to your diet or simply looking for a way to add a decorative touch to your dinner table, be sure to add a few of these pumpkins to your shopping list.
Not only are sugar pumpkins a nice alternative to the festive fall dinnerware sold in stores right now, nothing beats the look of them on your table. After baking just until the inside of the pumpkin is tender, each individual pumpkin can be served as its own serving bowl. The baked pumpkin adds delicious flavor to the other ingredients inside and can be eaten just as you would baked squash. As cute, edible decorations, you might find that your children who otherwise wouldn’t eat squash as a side will eat these with their stew or soup.
Since stews and soups always taste better when heated the se

  cond time around, I like making a pot the day before and using the leftovers when filling pumpkin bowls for the next day’s meal. Cute pumpkin bowls will perk up your otherwise boring leftover food while serving the dual purpose of adding bright color to your kitchen. Not only that, if you are serving these for company, these bowls make it easy to entertain by taking the place of a fancy centerpiece.
For an easy recipe to fill your sugar pumpkins with, the recipe for Beef Stew below is tasty and filling. Make sure, though, that you bake your pumpkin bowls on a large cookie sheet or jelly roll pan. Like many recipes made in my kitchen, I learned this one the hard way. After baking a large pumpkin filled with stew for way too long, three hours to be exact, the bottom of the pumpkin baked itself into my oven rack. After lifting up the large seventeen-pound pumpkin, the bottom broke away and broth from the stew spilled all over the bottom of the oven. Fortunately, a new idea was born out of this kitchen catastrophe. Thanks to my oldest daughter, the idea for the individual pumpkin bowls came about, becoming our newest and favorite way to bake our fall squash.
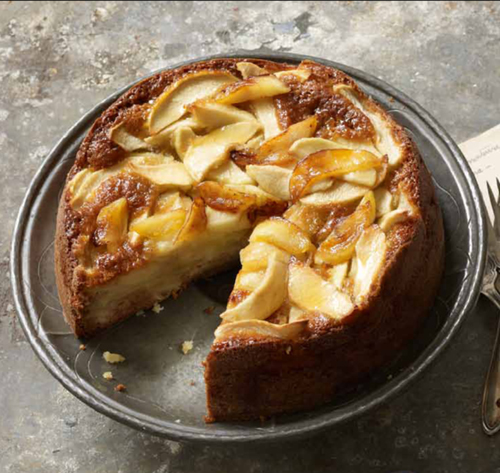
In keeping with a pumpkin-themed meal, delicious pumpkin desserts don’t come any easier than the recipe for the Pumpkin Sheet Cake below. Capable of being whipped up in minutes, the recipe below is one I’ve been making for years. As one of my kids’ favorite cakes, I make this one a lot throughout the fall and winter. Depending on the size of the crowd, this recipe can be halved for a standard baking pan or in a large jelly roll pan for a crowd of 25. Although some might prefer this cake served with pumpkin ale, some like myself will opt for the pumpkin spice latte. However, whatever your drink, three cheers to your next fall meal.

  Pumpkin Stew (6 servings)
2 pounds beef stew meat
4 tablespoons olive oil, divided
6 cups water
4 beef bouillon cubes
1 can (14.5 oz.) diced tomatoes, not drained
4-6 medium potatoes, peeled and cut into 1-inch cubes
6 medium carrots, sliced
1 large sweet onion, diced
1 teaspoon pepper
1 teaspoon salt
6 sugar pumpkins
1) In a Dutch oven, brown meat in 2 tablespoons oil. Add water, bouillon, tomatoes, potatoes, carrots, onion, pepper, and salt.
2) Bring all ingredients to a boil. Cover and simmer until vegetables are tender.
3) Meanwhile, remove tops of pumpkins and set aside. Discard seeds and loose fibers from inside. Place pumpkins on a large cookie sheet. Scoop stew into pumpkins and replace the tops. Brush outside of pumpkins with remaining 2 tablespoons of oil.
4) Bake at 350 for 1 ½ hours or just until the inside of the pumpkins are tender (do not over-bake). Serve in bowls or plates.
Kitchen Tip: If you like extra broth, add an extra cup or two of water to the recipe for Pumpkin Stew above.
Pumpkin Sheet Cake (20-25 servings)
2 ¼ cups pumpkin puree
3 cups sugar
1 ½ cups oil
6 eggs, slightly beaten
3 cups flour
1 Tablespoon baking soda
1 Tablespoon ground cinnamon
½ teaspoon salt
1) In a mixing bowl, combine pumpkin, sugar, and oil. Beat in eggs. Add flour, baking soda, cinnamon and salt. Mix just until blended.
2) Pour batter into a greased 15 in. x 10 in. x 1 in. jelly roll pan. Bake at 350 for 40 minutes or until cake tests done. Cool completely.
Cream Cheese Frosting
8 oz. cream cheese, softened
5 cups confectioners’ sugar
3-4 Tablespoons milk
1 teaspoon vanilla
1) For frosting, beat cream cheese, sugar, milk, and vanilla.
2) Spread over cake.
Homemade Pumpkin Spice Latte (makes one tall latte)
1 cup milk
1 tablespoon canned pumpkin
1-2 teaspoons sugar
1 tablespoon vanilla extract
½ teaspoon cinnamon
½ cup strong coffee
1) In a saucepan, combine milk, pumpkin, and sugar. Cook over medium heat, stirring constantly until liquid is steaming. Remove from heat. Add vanilla and cinnamon. Whisk until thoroughly combined.
2) Pour pumpkin mixture into a large mug and add coffee. Top with whipped cream, if desired, and add a light sprinkling of cinnamon or nutmeg. Drink and enjoy!
About this column: In The Kitchen With Jodee brings you easy, economical recipes from Avon Lake's mom-of-eight, Jodee Brooks.

Sunday, October 30, 2011

Explore Desserts That Taste Good & Make You Feel Great!

  One of the easiest ways to cut calories and get away from high sugar and high carbohydrate desserts is to indulge in healthy desserts. It’s those sugary, carbohydrate laden desserts that are standing in the way of becoming healthier. However, there’s no denying that everyone wants to enjoy a delicious dessert every now and then.
Nearly everyone has a sweet tooth to some degree and ending a delicious meal with a sweet treat seems very natural indeed, especially at holiday and family gatherings.
Fortunately there are some tips, tricks, and ideas that for low carb desserts and sugar free desserts that can be easily prepared. These desserts don’t take much time and the ingredients are inexpensive. However, some of these tasty treats contain carbohydrate-free sweeteners, so if you have issues with an irritable bowel caused by these kinds of sweeteners, be sure to carefully read all the ingredients in each recipe you are considering.
If you like to bake, but aren’t crazy about exploring new options on your own, there are a few things that can be used for excellent dessert items when cutting carbs, calories, and sugar from your diet. An ideal inexpensive, low carb, and no fat dessert is sugar-free gelatin. Sugar-free gelatin provides a light dessert with a sweet, fruity taste that will satisfy anyone. Adding a single teaspoon of a non-dairy whipped topping makes gelatin into a satisfying dessert that will surely please anyone. Adding a teaspoon of fresh fruit will make ordinary gelatin into a light tasty parfait that’s low in carbs and calories.
Sugar substitutes like Nutrasweet can be used or one of the new sweeteners that are made from natural plant extracts. These can be used to create amazing desserts with no calories and lower alcohol sugar content.
Healthy desserts are typically simple. Things like berries or fruit with some extra flavorings make excellent healthy desserts. For example, add some fresh raspberries or pineapple chunks to some fat free yogurt. It’s easy to satisfy a sweet tooth with the combination of tangy and sweet combination and cut down on calories, fat, carbs, and sugar.
Another great healthy dessert idea is to slice bananas lengthwise and sprinkle them cinnamon. When looking for healthy dessert ideas, choose fresh ingredients that are in season and substitute use these instead of other rich desserts that are packed with carbohydrates.
Sometimes it’s a little more of a challenge to prepare sugar free desserts, especially if you’re cooking for someone that has diabetes. Preparingsugar free desserts for someone that’s following a diabetic diet is difficult because fruit is packed with the kind of sugar that’s bad for a diabetic.

Friday, October 28, 2011

Time for Apple Picking

  We were very tired, we were very merry--
We had gone back and forth all night on the ferry;
And you ate an apple, and I ate a pear,
From a dozen of each we had bought somewhere;
Edna St. Vincent Millay
Is there anything better than an apple? Fall is my favorite season and apples play a large role. When October arrives and the leaves turn scarlet and orange, and the air turns cool and crisp, it's time for apple picking. I grew up in Scranton, Pennsylvania where apple picking was mixed with a ride in the wagon through the pumpkin patch. A generation later, my daughters had the same experience growing up in Connecticut. We returned home with bushels of apples, gallons of apple cider, pumpkins from the pumpkin patch, and of course, you had to try some of the warm apple cider and fresh baked cinnamon donuts. I can smell them now.
There is so much you can do with an apple. Eat it plain; slice it, and serve it as a snack with peanut butter; sprinkle it with sugar and cinnamon; bob for it; make delicious tangy candied apples that are so good you can't even wait for the candy to set. And did I mention caramel apples? My mother made them for her ten children all the time. Sometimes, she dipped the caramel and candied apples in coconut or chocolate and candy bits. Perfect for Halloween!
Then there's apple crisp. This is my youngest brother's favorite because it's so quick and easy to make. Just slice the apples and dust them with cinnamon sugar and put them in a buttered pie plate. Then you take a handful of oats and some more butter and cinnamon and crumble it on top of the apples and bake them for a half hour or so. Instant heaven. And you don't even have to make a crust. But of course, there is nothing like a great homemade apple pie.
Good apple pies are a considerable part of our domestic happiness.
Jane Austen
I don't like desserts, or even eat many desserts. But I make an exception for apple pie. I barely think of it as a dessert. As far as I'm concerned, it's real food. And you can dial the sweetness up or down. I personally like my hot, two crust, homemade apple pie (the only kind I will eat) with a piece of melted sharp cheddar cheese. But there are those who like some vanilla or ginger ice cream on the side. Who can blame them?
People say it's as American as apple pie. That has always surprised me. First of all, only the crab apple was native to America although now there are more than 7,000 varieties grown here. Let's remember Johnny Appleseed and the debt we owe him for planting so many orchards. Plus you can find great apple tarts in France, in Spain, and in England. They vary in process but each one is a taste delight. There are many delicious apple pie recipes on my DishandDine website.
But I thought it would be a special treat to share a new apple recipe with all of you. Our dear friend, Francine Segan, is a true Renaissance woman. We've read her themed cookbooks, listened to her talks on food history, and watched her cook. (See her videos on DishandDine.com) As fall begins, Francine has a beautiful new cookbook, Dolci: Italy's Sweets. Here is a recipe for a fantastic Rustic Tuscan Apple Cake. I felt that we could all use a scrumptious new apple cake recipe. Try it, and the book, too!
Rustic Tuscan Apple Cake

2011-10-28-DolciCovercrop.jpg
  Cookbook Title:
Dolci: Italy's Sweets
Photo: Ellen Silverman
Description:
Pareva la torta di Nonna Papera!
Looks like Grandma Duck's cake!
Said of a particularly pretty cake or pie
A classic! At first glance it may seem like a huge ratio of apple to dough and you're going to be tempted to cut down on the apples. Don't! It looks like a lot of apples, but they magically meld into the batter. You'll love the result. The top half of the cake is chock full of tender apples that float over sweet moist cake.
Deceptively simple, exceptional results.
Ingredients:
2 tablespoons olive oil or butter, plus more for the pan
7 ounces, about 1 1/3 cups, whole wheat or all-purpose flour, plus more for the pan
2/3 cup, plus 1 tablespoon, granulated sugar
2 large eggs or egg substitute
1/2 cup whole milk
2 teaspoons baking powder
1 teaspoon baking soda
Zest of 1 lemon
4 large or 5 medium apples, about 2 pounds total
Preparation:
Preheat the oven to 350 degrees.
Butter and flour an 8-inch cake pan. Beat 2/3 cup of sugar and the eggs in a large bowl, using a whisk or electric handheld beater, until creamy and light yellow. Beat in the flour, milk, baking powder, baking soda and zest. Pour the mixture into the prepared pan.
Peel and core each of the apples. Dice one of the apples and stir the dices into the batter. Cut the remaining apples into thin slices. Spread the slices over the diced apples in the pan in a neat pattern. Press into the batter. Scatter thin pats of butter or drizzle olive oil over the apples and sprinkle with the remaining tablespoon of sugar. Bake for about 75 minutes, until dark golden and cooked through.
This recipe and many other family favorites are available on DishandDine.com. Stop by and become part of this grass roots global food community!

Thursday, October 27, 2011

Dessert review: Meso Maya in Dallas

I’ve been getting more e-mails from people telling me that I need to sample the Pastel de Moras from Meso Maya than I get about my Nigerian Lottery winnings or about how I really need to do something about the size of my penis.
I could wait no longer! This place hasn’t been open for that long and the word is out. They don’t take reservations, so prepare for a wait on a Friday or Saturday night. The strip mall location at Preston and Forest was packed on a Friday night and I settled in for my hour wait for a table with good friends at 7 p.m. The weather was beautiful and I managed to steal a seat on the comfortable patio furniture from the Bettie White look-alike.
Once we finally got seated, I prepared the table for the masterpiece I had heard so much about. We were also drooling at the description of the other desserts. We formed a pact right then and there, that no matter how full we were, we needed three of the desserts on the menu. See, this, folks, is why I love my friends. Never one to back out on a pact or a pinky swear; they understand the importance of dessert.
An hour, several cocktails, and many delicious dishes later, dessert was served. Now, since I consider us to all be good friends by now, I will gift you this one piece of advice. If you do nothing today, do this: Go to Meso Maya and order the Pastel de Moras. The Pastel de Moras is a skillet blueberry cake paired with vanilla bean ice cream. This is a blueberry muffin on crack. It is the Johnny Depp of blueberry muffins. The blueberry “cake” is baked in a cast iron skillet, which is the best part. It gives the edges a crispy texture and the warm blueberries practically melt in your mouth. Pair that with a bite of the vanilla ice cream, and well, I may need some alone time, and extra napkins.
                           
Next up is the Crepas Con Cajeta, which is a buttermilk crepe, caramelized plantains, goat milk caramel, pecans, and vanilla bean ice cream. Think Mexican bananas foster. Not everyone at the table loved it, but I did love the taste of the rich, ripe, cooked plantains with the tart goat milk caramel. It is definitely a taste you have to get used to because when you take a bite, it tastes completely different than you would expect, but that is exactly what I loved about it.
Lastly, we ordered the Pastel de Chocolate, which is a double layer Mexican chocolate cake with strawberry sauce and Rompope. I am a huge fan of the slightly spiced Mexican chocolate cake, and the dollop of muddled strawberries on top was fantastic. However, I fully believe that the Rompope made this dish complete. Rompope is a type of Mexican egg nog, and I am no stranger to the sauce. However, I would have liked to seen more of it on the plate or perhaps infusing the frosting with Rompope? Hell, just bring me the bottle.
                          
Between all the actual sugar and the sugar from the alcohol metabolizing, I was soon about to crash. Once I did, it was not sugarplums I was dreaming about, but the delicious Pastel de Moras whom I plan to meet again very soon.

Wednesday, October 26, 2011

Volcano Pizza

Volcano Pizza, as the name shape is similar volcano would erupt. But if that is, lava is so tempting.

The process is a bit complicated, but if so, satisfaction beyond measure. If curious just try the recipe for one serving pizza volcano below.

Volcano Pizza Ingredients :


Basic dough skin II, 1 / 2 recipe

Shitake mushrooms, 4 pieces, cut into triangles

Chicken breast fillet, 150 grams, cut into rectangular

Onions, 1 / 2 fruit, cut into triangles

Red bell pepper, 1 / 2 fruit, cut into triangles

Tomato concase, 4 tablespoons

Mozzarella cheese, 100 grams

How to make Volcano Pizza :


Contents : Saute onion until fragrant. Add chicken, cook until it changes color. Add tomato concase, shitake mushrooms and peppers. Cook until done, remove and set aside.


Unroll half of dough skin. Place the contents on it.

Unroll remaining dough skin. Together with the skin is given the content, the gyre edge and reserving 1 cm for the pump hose hole.


Pump pizza until fluffy and cover tightly. Bake in oven at 220 degrees Celsius, until cooked. Remove and serve.

Monday, October 24, 2011

Home fruit planting

A home fruit planting carefully selected, properly located, and well managed can enhance the home landscape, provide high?quality fruits and serve as a satisfying hobby. Though is about Apple, Pear, Peach, Plum, Cherry, Apricot, or Strawberry, Blueberries, Raspberries, Blackberries, Grapes, Persimmon, the home fruit garden requires considerable care.

Thus, people not willing or able to devote some time to a fruit planting will be disappointed in its harvest. Growing fruit at home can be fun and provide your family with fresh, flavorful and nutritious food. The benefits are many:
You can grow large amounts of fruit in a relatively small area • Fruits are a good source of vitamins, minerals, carbohydrates, and fiber •
If you carefully choose the kinds and cultivars (varieties) of a fruit before you plant, you can harvest dessert-quality fruit from early summer through the fall
As an added bonus, the fruits you grow will taste much better than the fruits you find in the grocery store. Before you begin, you need to invest considerable effort into site selection, soil preparation, and planting plans. Before you order plants, you also need to learn about their pollination needs, their winter hardiness, and how susceptible they are to pests.
Some fruits are easier to grow than others. Tree fruits and grapes usually require more protection from insects and diseases than strawberries and blackberries.

So, strawberries aren’t much harder to grow than most annual garden crops and bear fruit quickly. Most tree fruits, on the other hand, require a large commitment to pruning, pest management, and care, and they won’t bear fruit right away.
Generally speaking, flowers and fruits of fruit trees must be protected by pesticide sprays from before blossom?time until harvest.
In addition, sprays may be required to protect leaves, the trunk, and branches. window.google_render_ad(); Small fruits are perhaps the most desirable of all fruits in the home garden since they come into bearing in a shorter time and usually require few or no insecticide or fungicide sprays.
Make sure you are ready to devote the time to your planting before you start. The success of your home fruit planting will be determined largely by:
• how susceptible your fruit site is to frost?
• whether your fruit site receives adequate sun.
• whether your site has well-drained soil at least 8 inches deep.
• whether you choose plants that are adapted to your fruit site and winter hardy.
• your ability to prevent fruits damage from diseases, insects, weeds and wildlife. • your ability to use good fruits cultural practices, including providing adequate water.
• your ability to do what is required in a timely manner. Fresh fruits can be available throughout the growing sea­son with proper selection of types and cultivars (varieties). Fruits soils and sites Plant fruits avoiding poorly drained areas.
Deep, sandy loam soils, rang­ing from sandy clay loams to coarse sands or gravel mixtures, are good fruit soils.
On heavier soils, plant in raised beds or on soil berms to improve drainage. All fruit crops are subject to damage from late spring freezes. Hills, slopes or elevated areas provide better air drain­age and reduce frost damages.
Make certain that the air can move freely throughout the planting site and is not “boxed” in with surrounding terrain or tree borders. Fruits do best in full sun. They can tolerate partial shade, but fruit quality will be lowered. Size of fruits planting area Plan the fruit planting to fit the area involved as well as family needs.
A smaller planting, well cared for, will usually return more quality fruit and enjoyment to the grower than a larger neglected one. One?half acre or less planted to adapted cultivars of the best kinds of fruit is usually adequate for the average family. Plans for fruits planting While growing fruit at home can be rewarding, it will cost time and money. To reduce these costs, carefully consider the design of your planting, including arrangement, spacing, cultivar selection, number of plants, and aesthetics. Develop a planting plan well in advance of the planting season.
Determine the kinds of fruits, cultivars, and quanti­ties of each needed. Locate a source of plants and make arrangements for plants to be available at the desired time of planting. One common mistake is to put the plants too close together. Allow ample room for growth so you can prune and perform other tasks.
Another common error is to put in more plants than you need. A small planting that receives proper care will yield more good-quality fruit than a larger planting that is neglected. Perennial weeds such as bermudagrass and johnsongrass compete heavily with young plantings and should be elimi­nated before planting. This can be done by spraying with a post?emergence herbicide such as glyphosate (Roundup‰) in late summer the year before planting or by shading out weeds by growing hybrid sudangrass for the year prior to planting. Strawberries especially should not be planted in newly turned under bermudagrass sod.
Not only will the bermu­dagrass regrow and cause extreme competition problems because of the short height of the strawberry plants, but the white grubs that frequently infest bermudagrass sod can destroy the strawberry roots. For best survival and production, supplemental water should be provided in the summer. Locate your fruit plantings near a water source.
Fruit planting If possible, set the plants immediately after arrival. If fruits roots are dry, completely immerse the roots in water for a few minutes or overnight before planting. Always water plants immediately after planting. Never allow the roots to dry out or freeze. When trees planting is delayed several days, heel in the trees by forming a mound of loose soil or mulching material. Place the roots into this mound, cover them, and moisten.
The trees may be vertical or horizontal as long as the roots are covered. This protects the fruit trees from drying or freezing.
Set trees about the same depth that they grew in the nursery row. Trim off broken and dried roots. Place topsoil around the roots and firm the soil to exclude air. Settle the soil with water and make sure the roots are left in a natural outward position. Leave a small basin one or two inches deep around the tree to aid in watering.
Prune back about one?third of the tree top. Wrap the trunk from the soil line up to the first branches (or 18 inches above the ground) to protect the trunk from sunscald, rodent injury, insect damage, and drying out. Fruit plants cultural practices During the first summer, cultivate or mulch around the fruit plants to reduce competition from other plants and to conserve moisture and fertility. Irrigation is especially important in the first few years while the planting becomes established. Pollination and fruits set One of the most common questions home fruit growers ask is, “Why won’t my plants set fruit?” There are many possible reasons for poor fruit set, including:
• a late spring frost.
• cold or rainy weather during bloom.
• disease.
• poor plant nutrition.
• inadequate pollination.
• lack of a compatible cultivar for cross-pollination in species that are not “self-fruitful.” Pollination and subsequent seed development are prerequisites for fruit set. With most fruits, flowers that appear in early spring begin as buds that form in the axils of the leaves during the previous year.
Flowers of many fruits bloom during early spring and can be damaged by frost. If temperatures fall below 30 degrees F when the flowers are vulnerable, some or all may be killed, reducing or eliminating fruit set.
Pollination occurs after the flowers have opened. Some fruits, such as grapes and peaches, shed pollen from their anthers (the male part of the flower), which falls by gravity or is carried by wind currents to the pistil (female part of the flower). With strawberries, blueberries, apples, plums, and sweet cherries, insects carry the pollen from flower to flower.
Heavy rains during bloom can interfere with pollen distribution or insect activity. Seed formation will be poor if pollination is inadequate, and seed formation is essential for the growth and development of most fruits. For example, apples with only a few seeds will fall off the tree in June or remain small and misshapen.
Some fruits, such as strawberries, raspberries, peaches, tart cherries, and grapes, are self-fruitful fruits. Each plant can set fruit with just its own pollen. Other fruits, such as apples, sweet cherries, pears, plums, apricots, and elderberries, are not self-fruitful fruits.
They require cross-pollination from another cultivar for fruit to set. Blueberry plants are self-fruitful, but berry size is larger with cross-pollination from another cultivar. Most nursery catalogs provide information about which cultivars are good for pollinating each other-for blueberries and other fruit crops as well.
Certain apple cultivars, such as Jonagold and Rhode Island Greening, produce pollen that is ineffective in setting fruit on other cultivars. To be sure of adequate cross-pollination, plant at least three different apple cultivars. With groups of sweet cherry cultivars, the pollen of some cultivars is not compatible with others within the group.
Yet the cultivar Stella is cross compatible with most sweet cherry cultivars and provides a good source of pollen for other cultivars. Stella is also self-fruitful. Many European plums (often called prune plums because of their high sugar content) are partially self-fruitful. But you can improve their fruit set by planting two or more cultivars.
You will need to plant two or more cultivars of Asian plums because most are not self-fruitful. Plant all fruit trees used as “pollenizers” within 100 feet of the cultivar to be pollinated. You may need fewer plants if you rely on neighbors’ trees as pollenizers, but you could have a major problem if those trees are destroyed.
Aura Angheliu is a Romanian floral designer with many ideas of natural decorations, freelance writer of nature, flowers and plants, traditional treatments and of the flower shop business. She also loves nature, flowers and to make floral arrangements.

Friday, October 21, 2011

One bottle of wine

If you have ever bought a bottle of wine you thought you loved and felt disappointed because it didn’t taste as good as the last one, you’re not alone.

There are a 1,000 reasons why this might happen. The more processed and industrialised a wine is, the more likely you are to find uniformity from one bottle to the next.
At the extremes of this scale, you might say it’s like buying a lurid packet of Mr Kipling’s cakes (Blossom Hill, anyone?) compared to a box of plums (natural wine), some of which will taste sweeter than others and one or two of which might have a little bruise.
But what about all those wines in between? The ones we find in the supermarket that aren’t corked or oxidised or anything else but just… don’t taste as we remember them?
Timing makes a difference, of course: wines develop, which can be a good thing or, on occasion, a very bad thing. Some cheap wines don’t have the power to last the year they need to be on shelf before the next vintage comes along.
Like a marathon runner who hasn’t put in the training, you can feel them flagging after six months; by the 10th they’re lying by the side of the road waiting for St John Ambulance.
There were a couple of those at the recent Asda press tasting. “This is completely shagged,” as one of my tasting colleagues put it of the Asda Corbières 2009 France (£3.56), a technical term that didn’t go down awfully well with the buyer.
The 2010 of the same wine, by contrast, looked really good – but it was an as-yet unbottled tank sample, due to arrive some time before Christmas, so I’d want to taste it again in its finished condition before recommending it.
With the cheapest wines, it’s common practice for supermarket buyers to tweak the blend that goes into a particular label across the year to keep it tasting fresh.

For example, a white blend of colombard and ugni blanc from southern France might be made dryer as the year wears on because as its acidity fades, too much sweetness will make it taste lazy and sluggish.
You’re not necessarily being short-changed by being given a different wine; the idea here is to create a greater semblance of consistency, although you may well notice a difference.
Talking of blends, a bottle of wine looks so neat and tidy it is easy to believe that one is identical to the next, but it’s logical that the number you can make from the same batch is dictated by the size of your largest mixing bowl.
That’s why Ernest & Julio Gallo have a subterranean blending tank so large they have been known to invite a full-sized orchestra to play inside it.
And why, at the Cave de Saumur, an excellent co-operative in the Loire, they have eight tanks each with a capacity of 100,000 litres, or about 130,000 bottles of wine. This blend can then be stored in smaller tanks and bottled to order – wine ages more slowly in tank than it does in bottle, so the idea here is to keep the wine fresh until it’s sold.
In theory, new bottlings should taste virtually the same but, somehow, sometimes, they just don’t.
I’ve known buyers ask for fresh samples to be sent out to journalists because a new bottling wasn’t showing as well at a tasting as they felt it should.
I’ve also tasted wines that appear to be the same but vary so wildly in quality I find it hard to believe they could possibly have come from the same blend at all.
A case in point was Waitrose’s own-label claret which, last autumn, I tried on several occasions inside a week, fascinated by its extreme awfulness. How could anyone let such a wine through? It tasted as if a small family of mice had been drowned in it and left to decompose.
Two months later, I called the wine in again, feeling certain that it would make the grade for an article I was writing on what not to buy. And guess what?
It tasted completely different – an improvement I would find hard to put down to a couple of months of ageing in bottle.
Sometimes wines go the other way. I’ve seen competition judges frowning in lack of recognition over wines which, just a few months earlier, they had garlanded with awards.
Could it be that, sometimes, a winning blend sells out and a lesser blend, from different tanks, is made and bottled in its stead?
“That would be a very big accusation,” Philippa Carr at Asda points out.
All of this variability might seem taxing, but it’s life: if we really want wine to be produced on a grand enough scale to stock every supermarket in the land, then different bottlings and blends are an inevitable outcome.
And, most of the time, they do work in our favour.

Wednesday, October 19, 2011

Pierre Hermé

Hello! I’m back from a week in sunny Florida, where it didn’t feel like fall at all. But I have a surprise side story: while I was there, I made a quick side trip to New York, and the 6th Star Chefs International Culinary Congress.
I didn’t intend to mix business with pleasure, but there was one reason why I couldn’t pass up this opportunity: Pierre Hermé. Any of you who have read my blog know that he has been one of my biggest pastry heroes and inspired me to go to pastry school.

The master himself was at the congress to judge a pastry competition, and to give a pastry demonstration. It is extremely rare for him to make an appearance in the US, so when Bravo North America kindly offered me the chance to sit in on Hermé’s class, there was only one answer: YES!
There were so many other famous and accomplished chefs at the congress; I wish I could have attended the entire three day event. The congress is a showcase for culinary professionals, so there was a lot of very refined, cutting-edge cooking going on – the best of the industry sharing information and techniques with each other.
Again, there were many amazing-sounding presentations I would have liked to see, but I was there for only one day, and really for one person. Above, the first presentation featuring Hermé on the main stage. Here he is, going over some last-minute checks with his assistant chef.


The talk was titled, “Emotions to Share: A Total Immersion in Sensations and Pleasure”, and focused on Hermé’s dessert philosophy and continuing pastry innovations
. Hermé showed off two creations from his dessert line called “Emotions to Share”. These desserts are a middle ground between the traditional simple cakes found in bakeries, and the elaborate, multi-component desserts in restaurants, and quite appropriately the theme for these two creations was “Entre”, or “in between”. On the video screen above you can see some of the ingredients used in the demo.
If you are familiar with Hermé’s Emotion line, a series of verrines, or parfaits, these are like supersized versions, hence “Emotions to Share”. Hermé explained that by using a mold to contain the various layers, he was able to use more delicate textures, such as pastry cream, geleés, and thin genoise, than he could in a standalone cake.
The second dessert, called “Delicieux”, featured wasabi geleé, fresh and confit grapefruit, white chocolate and wasabi mascarpone, and matcha marshmallows.
While the combination of flavors may seem offbeat, Hermé’s elaborations about the genesis of this dessert showed how much thought he puts into every element of his creations. For example, he met with a wasabi producer in Japan and learned that the bottom 1/4 of a wasabi root has a sweeter taste than the rest, so that is the part he uses. He grates fresh wasabi into the geleé as he is making it for the best flavor.
When he cuts up the grapefruit to layer in the dessert, he always includes part of the flesh, the pith, and the peel, because he wants to include all of their different flavors in the final product. The combination of wasabi and grapefruit is meant to contrast bitter and acidic – although this may not seem intuitive for pastry, he has obviously figured out how to make the two flavors work, because this is one of his most well known pairings.
The first Entre was composed of a strawberry-tomato geleé layered with olive oil mascarpone cream flecked with black Ligurian olives, and tomato fleur de sel puff pastry. You can see the puff pastry here, cut into individual “matchsticks”, which are placed between layers of cream to give texture and crunch.
Afterwards, I took a stroll around the main floor before the second Hermé demonstration started. Here’s a display case full of more dessert-y goodness. I like the cakes on the upper right with the multi-colored macaron fringe.The finished dessert has strawberries and more puff pastry arranged over the top. A very intriguing sounding combination – it was too bad that we could not sample it!
Obviously the big question in the audience was, how does Pierre Hermé come up with his crazy yet delicious flavor combinations? When asked, Hermé displayed his true artist’s nature. Asking an artist where his inspiration comes from is obviously one of the most difficult questions to answer. Hermé claimed that he does not seek flavors, they find him.
He comes up with a scenario, an architecture of taste in his mind, and then selects and refines the techniques to achieve this imagined result. As I listened to him describe his creation process, I was able to parse some general guidelines:
1.Get to deeply know your ingredients – for example, going to Japan to learn about wasabi.
Hermé also likes to explore all the various forms of one flavor: his Infiniment Vanille series of desserts features vanilla in every component, layered to create an extreme vanilla experience.
He even created a special Pierre Hermé house blend of vanilla, a mix of Tahitian, Madagascar, and Mexican vanilla proportioned to his liking, that he uses in his pastry.
2. Don’t take flavor combinations for granted. Hermé said that every time he recreates his famous Ispahan combination (raspberry, rose, lychee) in a new form – say ice cream, or tart, he has to re-evaluate how the flavors work together in a different format.
It’s not just of matter of throwing the same flavors together any old way. He works to recalibrate the flavor balance in the new incarnation so the interaction, and the overall experience, is the same.
3. It may take time to get flavors to work together properly. Hermé related how he originally paired grapefruit and wasabi in a sorbet, but wasn’t happy with the result. It wasn’t until later that he got the combination to work in a macaron, and finally his “emotions to share”.
Hermé also has a sly sense of humor. When someone in the audience mentioned that she was having difficulty getting her customers to try her matcha-inspired desserts, he answered that the first time he tried matcha, he hated it. He said that he had to keep trying it to figure out how to use it in a dessert.
He suggested that sometimes it will take time and patience for your audience to “get” what you have created. He also joked that when he first came up with the Ispahan combination at Fauchon, it sold once every earthquake – meaning not very often. It’s hard to imagine that Hermé’s signature flavor wasn’t immediately embraced by the public, but it took a while to catch on.
Now, it seems every pastry shop has their own version of the Ispahan. I thought Hermé was very kind in encouraging young pastry chefs to be persistent, and to believe in their craft.

Monday, October 17, 2011

Beautiful Cookies

As I’ve told you before, last Purim I’ve played the cookie game, on an Israeli food forum I’m a member of. There are many talented members on that forum, but one of the most talented among them is Sivan, the girl who sent me the cookies on that game. The cookies were so great, that they barely lasted a week, and we’re talking lots of cookies here.

One of the cookies we loved most in that package were these alfajores, maybe the best I’ve ever eaten. Avi says I’m declaring that too often about food, but in this case, he definitely agreed with me.
For a few months now, a good friend I work with, told me about her cookie fobia. “No cookies I ever make turn out well”, she used to tell me. So a few weeks ago I invited her over for a cookie baking evening, to get rid of her fobia. And we made these awesome alfajores! The recipe was very accurate, as all Sivan’s recipes, and it allowed us to reach the same great cookies as the ones she sent me.
Do you also have a cookie or other pastry fobia? First of all, try these cookies. They are real easy to make and to get great results with. And second, remember that many times the reason of a failed dish is a not accurate enough recipe, or one that is lacking important information, and there’s also the reason of not following the recipe closely enough. The pastry world, as you probably know, requires a great deal of accuracy. So go ahead, give your fobia subject one more try, this time with a recipe from a reliable source, and try to follow it exactly as it’s written.

Some notes and tips about these cookies:

* This recipe calls for a mixer. Don’t have one? No worries, you can also do it manually. Use cold butter instead of softened one, and cut it into cubes. Place all the ingredients except the egg yolks and vanilla extract in a bowl, and crumble the mixture by rubbing it in your palms. The final mixture should be crumbly, and resemble to couscous crumbles, only a bit bigger. Then add in the yolks and the vanilla extract, and knead it only until a uniform dough is created.
* The secret of a good short crust is processing it as little as you can since the flour comes in contact with liquids, so make sure you pay attention to it.
* Not that much into dulce de leche? You can fill these cookies also with Nutella or with a chocolate spread or halva spread, and even with dates spread.
* If the spread you chose is too firm to work with, warm it for several seconds in the microwave.
Alfajores / Siva
For about 25 alfajores
Ingredients:
150 gr butter, soft
100 gr powdered sugar
1 tsp vanilla extract
150 gr cornstarch
150 gr flour
5 gr baking powder
4 egg yolks
For filling and rolling:
A jar of dulce de leche
Coconut flakes
Directions:
1. Cream butter and powdered sugar in the mixer (no mixer? see tips), add in the yolks one be one and then the vanilla extract.
2. In a separate bowl, mix the cornstarch, flour and baing powder, and add them into the butter mixture. Process only until a dough is formed, and not longer than that. Chill in the refrigerator for 2 hours.
3. Preheat the oven to 350F (180C).
4. Roll the dough 0.5 cm thick, and cut cookies out of it using a glass or cookie cutters.
5. Bake for about 10 mins, or until the cookies just begin to change their color, but are still relatively light.
6. Pipe (or use teaspoonfulls) dulce de leche on top of one cookie, close it with a “clean” cookie and squeeze a bit, for the filling to show a little, so that it will easily stick to the coconut. Roll the cookies in coconut flakes.

Sunday, October 16, 2011

Chocolate Dessert


To start off, you need to make two lots of biscuit dough, one flavoured with vanilla, the other with cocoa. For the vanilla dough, mix one batch of flour, icing sugar, butter and salt with the seeds from the vanilla pod and rub together.

Work the mixture until it warms slightly and turns to a firm dough.
For the chocolate dough, mix a second batch of flour, icing sugar, butter and salt, only this time replace 25g flour with 25g cocoa. Work together in the same way.

Line the base of two round 18cm sponge cake tins with a disc of nonstick paper and heat the oven to 180C (160C fan-assisted)/350F/gas mark 4. Meanwhile, get on with the cake mix – melt the chocolate, then beat in the oil, cream, sugar, honey and vanilla. Beat in the eggs one at a time, then stir together the cocoa, flour and baking powder, and sift in. Divide the mixture between the tins and bake for around 25 minutes, until a skewer pulls out with just a few crumbs sticking to it.

Line the base of an 18cm square tin with nonstick paper, pat the vanilla dough evenly into it, then flip it out on to a worksurface. Repeat with the chocolate dough, then lightly brush water on top of one sheet of dough and squarely lay the other on top of it. Use a rolling pin to seal, then cut into thirds.


Brush each third lightly with water and stack in alternating chocolate and vanilla layers. Wrap and chill for 30 minutes. Cut lengthways into 1cm slices, moisten again and stack alternately in layers. Wrap and chill once more, then cut into 0.5cm chequerboard slices. Lay on a tray lined with nonstick baking paper and bake at 160C (140C fan-assisted)/320F/gas mark 2½ for 20-25 minutes, until crisp and barely golden.

While the cakes are warm, make the syrup by stirring the icing sugar and vanilla with 25ml boiling water. Prick the cake tops, spoon over the syrup and leave to cool in the tin, covered with paper or clingfilm.


For the frosting, melt the chocolate and butter, stir in the honey, bourbon and sifted icing sugar, leave until cool, then beat in the sour cream. When the mixture firms slightly, beat again, sandwich the cakes together with it and spread the rest over the top and sides.

For the mousse, briskly stir the egg whites and sugar over a gentle heat until about to set and piping hot (this kills any bugs), then whisk to a thick, light meringue.

Melt the chocolate, stir in the brandy and boiling water, fold in the meringue, spoon into ramekins, cover and chill to set. Serve with the biscuits for dunking.

Monday, October 10, 2011

How to make Chicken Enchiladas


Ingredients:
8 6-inch tortillas
1/2 c chopped onions
4 cloves garlic, minced
1 t ground coriander
1/4 t pepper
2 T margarine or butter
3 T all-purpose our
8 oz sour cream
2 c chicken broth
2 seeded and chopped jalapeno peppers; or one 4-ounce can diced green chili peppers, drained
1 c (4 oz) shredded Monterey Jack cheese
2 c cooked chicken
Sliced pitted ripe olives (optional)
Chopped tomatoes (optional)
Sliced green onions (optional)
Chicken Enchiladas Wrap torillas in foil. Heat in a 350 degree over for 10 to 15 minutes or until softened.
For sauce, in a saucepan saute onion, garlic, coriander, and pepper in margarine or butter until onion is tender. Stir our into sour cream; add to onion mixture. Stir in broth and chili peppers all at once. Cook and stir until thickened and bubbly. Remove from heat, stir in 1/2 cup of cheese.
For _lling, stir 1/2 cup of the sauce into chicken. Place about 3/4 cup _lling atop each tortilla; roll up. Arrange rolls, seam side down, in a lightly greased 12 by 7 inch baking dish. Top with remaining sauce. Bake, covered, in a 350 degree oven for about 35 minutes or until heated through.
Sprinkle with remaining cheese. Bake, uncovered, about 5 minutes more or until cheese melts. If desired, sprinkle with olives, tomatoes, and green onions.
Let stand 10 minutes.
Makes 4 servings.

Idea 2:


Roast chicken :
1 chicken, cut into 2 sections, then baked
2 tablespoons cooking oil
6 tablespoons sweet taste soy sauce
2 tablespoons honey
Sauce :
2 tablespoons olive oil
1 pc onion, chopped
3 cloves garlic, minced
3 large red chilli
3 large green chilli
200 ml broth
500 grams tomatoes, blender, then boil until thickened
1 teaspoon salt and 1 / 2 tsp pepper powder
6 tortillas, heat
150 grams cheddar cheese, grated

How to cook Chicken Enchiladas :

Roast chicken: for chicken marinade, combine oil, sweet soy sauce, and honey, let stand for 15 minutes. Roast the chicken until cooked, scratched.
Chili seeded and green chilies, then chop.
Sauce: heat oil, saute onion and garlic until fragrant.
Enter the chopped chilies, broth, tomato puree, salt, and pepper powder, cooking until thickened, lift.
Prepare heat-resistant dish, take the tortillas, fill with grilled chicken scratched and cheese, then roll. Pour sauce over tortillas, sprinkle with cheese and grilled for 20 minutes, lift. Serve.

Friday, October 7, 2011

Pumpkin pie is an irresistible fall classic

Pumpkin pie is an irresistible fall classic; here, a new dimension is added with a few simple additions, including adding molasses to the filling and finishing off the pie with an airy meringue.
Recipe Ingredients
Tart Shell
1 cup plus 2 Tbsp all-purpose flour
3 Tbsp confectioners’ sugar
1/4 tsp salt
3 Tbsp each cold unsalted butter and solid vegetable shortening, cut in bits
1 large egg yolk mixed with 1 tsp cold water
Filling
2 large eggs
1/2 cup packed light brown sugar
1 Tbsp molasses
1 1/2 tsp pumpkin pie spice
1/2 tsp salt
1 can (15 oz) 100% pure pumpkin
1 cup heavy cream
Meringue
1 cup granulated sugar
1/2 cup water
4 large egg whites, at room temperature
Recipe Preparation
Lightly butter a 9 x 1-in. tart pan with removable bottom. In food processor
, pulse flour, confectioners’ sugar and salt to mix. Add butter and shortening; pulse until mixture resembles coarse crumbs. Pour egg mixture over crumbs; pulse until dough starts to clump together. Remove dough from food processor and squeeze together into a ball. Press dough evenly over bottom and up sides of pan, slightly extending about 1/4 in. above the top edge of pan. Freeze shell 30 minutes.

Adjust oven rack to bottom third of the oven. Heat oven to 375°F. Remove crust from freezer; line with nonstick foil tightly against bottom, sides and top edge of crust. Place tart pan on baking sheet; bake 25 minutes. Carefully remove foil; return crust to oven 5 minutes (if crust puffs, gently press it down). Cool completely on rack. Reduce oven temperature to 350°F.
Whisk ingredients until blended and smooth; pour into crust. Cover crust edge with foil or pie shields. Bake 50 minutes or until filling is set and crust is golden. Transfer to a wire rack and cool completely.
In a small, heavy saucepan, bring sugar and water to a boil; stir just until sugar dissolves. Boil, without stirring, 4 minutes. Meanwhile, in large bowl of stand mixer, beat egg whites at medium speed until soft peaks form. Beating constantly, slowly add hot mixture to whites in a thin, steady stream. When incorporated, increase speed to high and beat meringue until stiff yet billowy glossy peaks form.
Heat oven to 425°F. Remove sides of tart pan and place tart on a baking sheet. Loosen bottom of tart pan from crust with an offset spatula; leave pan bottom in place. Starting at edge of crust, spread some meringue over filling, sealing it against the inside edge of the crust and mounding meringue high in center; make decorative swirls in meringue. Bake 5 minutes or until swirls and tips are lightly browned. Let cool. If desired, slide tart off pan bottom onto serving plate.
Prep Tip: Tart can be prepared through Step 3 two days ahead and refrigerated. Bring to room temperature and blot surface dry with paper towel before topping with meringue.

ICE CREAM

MANGO ICE CREAM 

¾ cup heavy cream
2 tbsp superfine sugar
1¾ cups mango juice
¼ tsp ground cinnamon
almonds to decorate
Pour the cram into a large bowl, then add the sugar and whisk lightly until dissolved. Stir in the mango juice and cinnamon.
Cover the bowl with foil and then place in the freezer for 4 hours or preferably overnight, until set. During the first hour of freezing, gently shake the molds 3 times.
Decorate with almonds.

KULFI ICE CREAM 


5 cups canned evaporated milk
3 eggs whites
3 cups confectioner's sugar
1 tbsp rose water
1 cup pistachios, chopped
plus extra to decorate
½ cup almonds
½ cup raisins
1 tsp ground cardamom

ROSE ICE CREAM

 
6½ cups heavy cream
2 tsp rose water
¾ cup granulated sugar
½ tsp red food coloring
Combine heavy cream, rose water, sugar and food coloring.
Cover the bowl with foil and then place in the freezer for 4 hours or preferably overnight, until set.

5-8 candied cherries to decorate (optional)
Start preparing the day before you want to serve ice cream. Place the cans of evaporated milk on their sides in a pan. Pour in enough water to come about three-quarters of the way up their sides and bring to a boil.
Reduce the heat, cover tightly and let simmer for 20 minutes. Remove from the heat, let cool, then let chill for 24h. Place a large bowl in the refrigerator to chill.

The next day, whisk the egg whites in al spotlessly clean, grease free bowl until soft peaks form. Pour the evaporated milk into the chilled bowl and whisk until doubled in size. Fold in the egg whites, then the sugar. Add the rose water, the pistachios, almonds, raisins and cardamom.
Cover the bowl with plastic wrap and freeze for 4 hours, or preferably overnight, until set.
Scoop the ice cream into serving dishes, decorate with chopped pistachios and candied cherries to serve.

Wednesday, October 5, 2011

Making Dessert

I'm no fashionista by any means – you'll sooner find me in Sur La Table than in Saks, and when in bookstores I go for the cooking magazines over the fashion glossies. However, it has not escaped even my offhand attention that purple seems to be quite the popular shade for fall – in every store window I pass by there seem to be clothes in hues of mauve, eggplant, violet, and plum.

Well, my wardrobe may not be on-trend for fall, but my kitchen is: I've been hoarding plums of every variety that I can find at the market. Their dramatic, jewel-toned skins give them star presence on my table: every day they remind me that I ought to use them properly, in a way befitting their gorgeous succulence.
I'd been wanting to make a galette, and what better showcase for delicately thin slices of plum, fanned out in a golden, ruby-edged sunburst?

Interestingly, galette can mean many things in France, depending on the region. It can be a flaky, sabl̩-style butter cookie. It can be a cr̻pe, especially a savory one. It can be a round, pastry-like cake РKing's Cake is known as galette des rois, and I made it in pastry school Рwhat a time-consuming task that was! But galette can also mean a freeform, open-faced tart, and that also seems to be the most popular incarnation of the term over here in the states. To me, the casual, almost deceptive rusticity of a galette is what makes it so charming: it simultaneously embodies the spontaneity of making use of what's fresh at the moment, and it's also a really tasty way to enjoy some really delectable fruit.
I kept the galette as simple as possible: my favorite blitz puff for a light, flaky, buttery crust, spread with a little frangipane to add some nutty dimension, and a topping of plum slices – nothing else required.

Modern Classic: This is traditional, tried-and-true, and never out of style: buttery puff pastry, almond frangipane laced with vanilla bean and cinnamon, and sweet, juicy plums on top. Notice the puff pastry got so puffy it nearly unfolded itself!
However, just as in fashion you choose the styles that appeal to you (or least pick the ones that suit you best so you don't end up a fashion victim!), so I've made two variations of the galette, so you can select which one catches your fancy.

Edgy Sophisticate: This number adds a few unexpected twists for a different sensibility. The puff pastry has cocoa powder added for a bittersweet chocolate richness, and the frangipane is flavored with star anise. Combined with the plums, this makes for a decadent and no less delicious experience.

I found both of them worked quite well with the fruit without overpowering it. Flaky, delicate, fruity, sweet, rich – everything I was looking for. And it was so simple to put together, it's easy to experiment with other additions and combinations. I hope you try your own combinations of flavors with this galette. Who knows, you may find your signature style!

Monday, October 3, 2011

Sugar Desserts

Sugar Free Desserts
‘Sugar Free Desserts’ as the name suggests are meant for people who have diabetes i.e. high blood sugar or those who want to lose weight because sweet is believed to enhance weight and also senior citizens or youngsters who want to reduce the intake of sugar in their diet due to old-age or for dieting purpose. Such people find it difficult to resist desserts or sweets so you can make it with something called sugar substitutes which is called ‘Sugar free’ in the market.
‘Sugar free’ is of three types. The first one is a tablet made of fruit concentrates or purees which can be put in one’s tea or coffee and stirred to get the sweet taste, it’s not as harmful as table sugar since this is a form of natural sugar stored inside fruits rather than the raw form like found in the case of table sugar. The second variety is made from aspartame, which is in powdered form mostly. It’s made from a protein derivative and is 200 times sweeter than table sugar. The third variety is made from sucralose.
‘Sucralose’ or ‘Sucrose’ is another name for table sugar but in this case it undergoes a multi high tech process which definitely makes it 600 times sweeter than the table sugar but without the calories of the table sugar. It’s the latest version of ‘Sugar-free’.
Wheat Cookies Ideal For Diabetics
Ingredients
1/3 cup any cooking oil
200 grams brown sugar substitute
1 teaspoon vanilla extract
1 egg
1 cup wheat flake cereal
½ cup all purpose flour
¼ cup wheat flour
½ teaspoon baking powder
2 tablespoons wheat germ
½ cup raisins
½ teaspoon baking soda
1 tablespoon water
Method
Chop the raisins and keep aside. Then take a bowl and start adding the ingredients one after the other and mix thoroughly except the baking soda which also has to be added but in the end mixed with a little water with the bubbles rising to the top and again mix the mixture properly so that a perfect cookie mixture is made. Pour it in small lumps on a greased cookie sheet and bake in an oven, which has been set at 350 degrees F for 8-12 minutes.
Sugar free Dessert Recipes
Chocolate Fondue
Ingredients
¾ cup cocoa
¼ tsp cinnamon powder
¾ cup milk
½ tsp vanilla essence
½ cup any variety of sugar free.
Cream the cream cheese which has been softened previously in a bowl, then add the pecans, chocolate squares which has been melted and cooled sufficiently, the vanilla essence and the sugar substitute and blend thoroughly. Pour the mixture into an oven dish or any other flat dish lined with foil and refrigerate it. Cut it into 1-inch squares and serve chilled after 10-12 hours of refrigeration.
Cherry Bars
Ingredients
16 ounces cherries (deseeded)
8 ounces non-sweet chocolate cake mix
2 tablespoons sugar substitute of your choice
Method
Take cocoa in a bowl and add the milk to it and mix slowly so that no lumps are formed, then add the cinnamon powder and heat it on the gas over medium heat stirring continuously until it comes to a boil and then reduce the flame and let it simmer for another 5 minutes stirring continuously. Stirring continuously is a must for any fondue mixture. Once the mixture is done remove it from the flame and allow it to cool a little. Once cool add the sugar-free and vanilla essence and then pour it into a fondue pot and serve.
Apple Carrot Cake
Ingredients
2 cups self-rising flour
½ cup butter
1 teaspoon cinnamon powdered
1 cup walnuts (silvered)
2/3 cups raisins
2 cups apples (peeled and grated)
1 cup carrot (peeled and grated)
1 teaspoon orange peel (grated)
2 eggs
4 tablespoons orange juice
Method
Cream the butter and then add the cinnamon powder to it, then add the self-rising flour slowly by slowly to it and then add all the grated ingredients and then add the egg slowly one by one and mix properly and finally the orange juice and mix the mixture well so that all the ingredients are blended properly.
Then pour the mixture into a greased oven dish and bake it in a preheated oven for 1 hour 15 minutes depending on your oven heat at 350 degrees.
Pecan Sugar-free Fudge
Ingredients
16 ounces softened cream cheese
2 non-sweet chocolate squares
½ cup sugar substitute
½ teaspoon vanilla essence
½ cup pecans (silvered)
Method
Method
Drain all the water from the cherries and keep it aside. Mix together the cake mix, cherries and sugar substitute in a bowl with a whisk so that the mixture gets thoroughly mixed. Pour the mixture into a well-greased ovenproof cake dish and bake at 375 degrees for 25 minutes.